Showing posts with label cupcakes. Show all posts

12 August 2014

Nigella Challenge: Blueberry Muffins

You can't go past a good muffin. But the thing is, a good muffin is hard to find. Those giant, mass-produced, fat and sugar laden cafe staples are always disappointing. And really, there is no excuse, because a muffin is the easiest thing to make and they're on the healthier end of the baked goods spectrum (lack of butter, half the sugar of biscuits, etc...). Basically, it is not hard to make a good muffin.

Be warned, these look nothing like the giant cafe ones (though you could invest in a Texan muffin tin and adjust your cooking times) but they taste far superior. These are best fresh out of the oven, but they keep reasonably well for a few days in an airtight container (a few seconds in the microwave will warm them again if you like).

I also suggest you use fresh blueberries when they're in season (indeed, any berry in season or a mixture, as this is a great base muffin recipe), but frozen would do just fine. This isn't too extravagant as they only use 1-2 punnets. If you use frozen, don't defrost them before adding to the batter or you'll end up with green-hued muffins. I have made a gluten free version of these with great success too, but depending on the flour you use you made need to add a little more or less, so tread carefully.

Lastly, the most important thing for a great muffin is not to over mix. The idea is to just combine the ingredients - there will be lumps! Over mixing is what makes a muffin tough.

  • 75g butter, melted
  • 1 1/3 cups plain flour
  • 1/2 tsp bicarb soda
  • 2 tsp baking powder
  • 1/3 cup caster sugar
  • 200ml buttermilk (OR 100g plain yoghurt and 100ml milk)
  • 1 egg
  • 200g blueberries
Preheat oven to 200C and line a 12-hole muffin tin with paper cases or grease well.

Combine dry ingredients in a bowl. In a jug, combine the wet ingredients. Pour this into the dry ingredients and gently mix. Add the blueberries, mixing until just combined (remember - too much, and you'll have a tough muffin).

Divide mixture among muffin tin (an ice cream scoop is handy, other wise the old spoon and spatula combo). Bake for 20 minutes until risen and golden.

You could eat these lathered with butter and jam for breakfast or brunch (its delicious) or enjoy them as are, warm or cool. As for variations, I've made a blackberry and apple version, and the cafe classic raspberry and white chocolate. 


13 February 2014

Blueberry Muffins

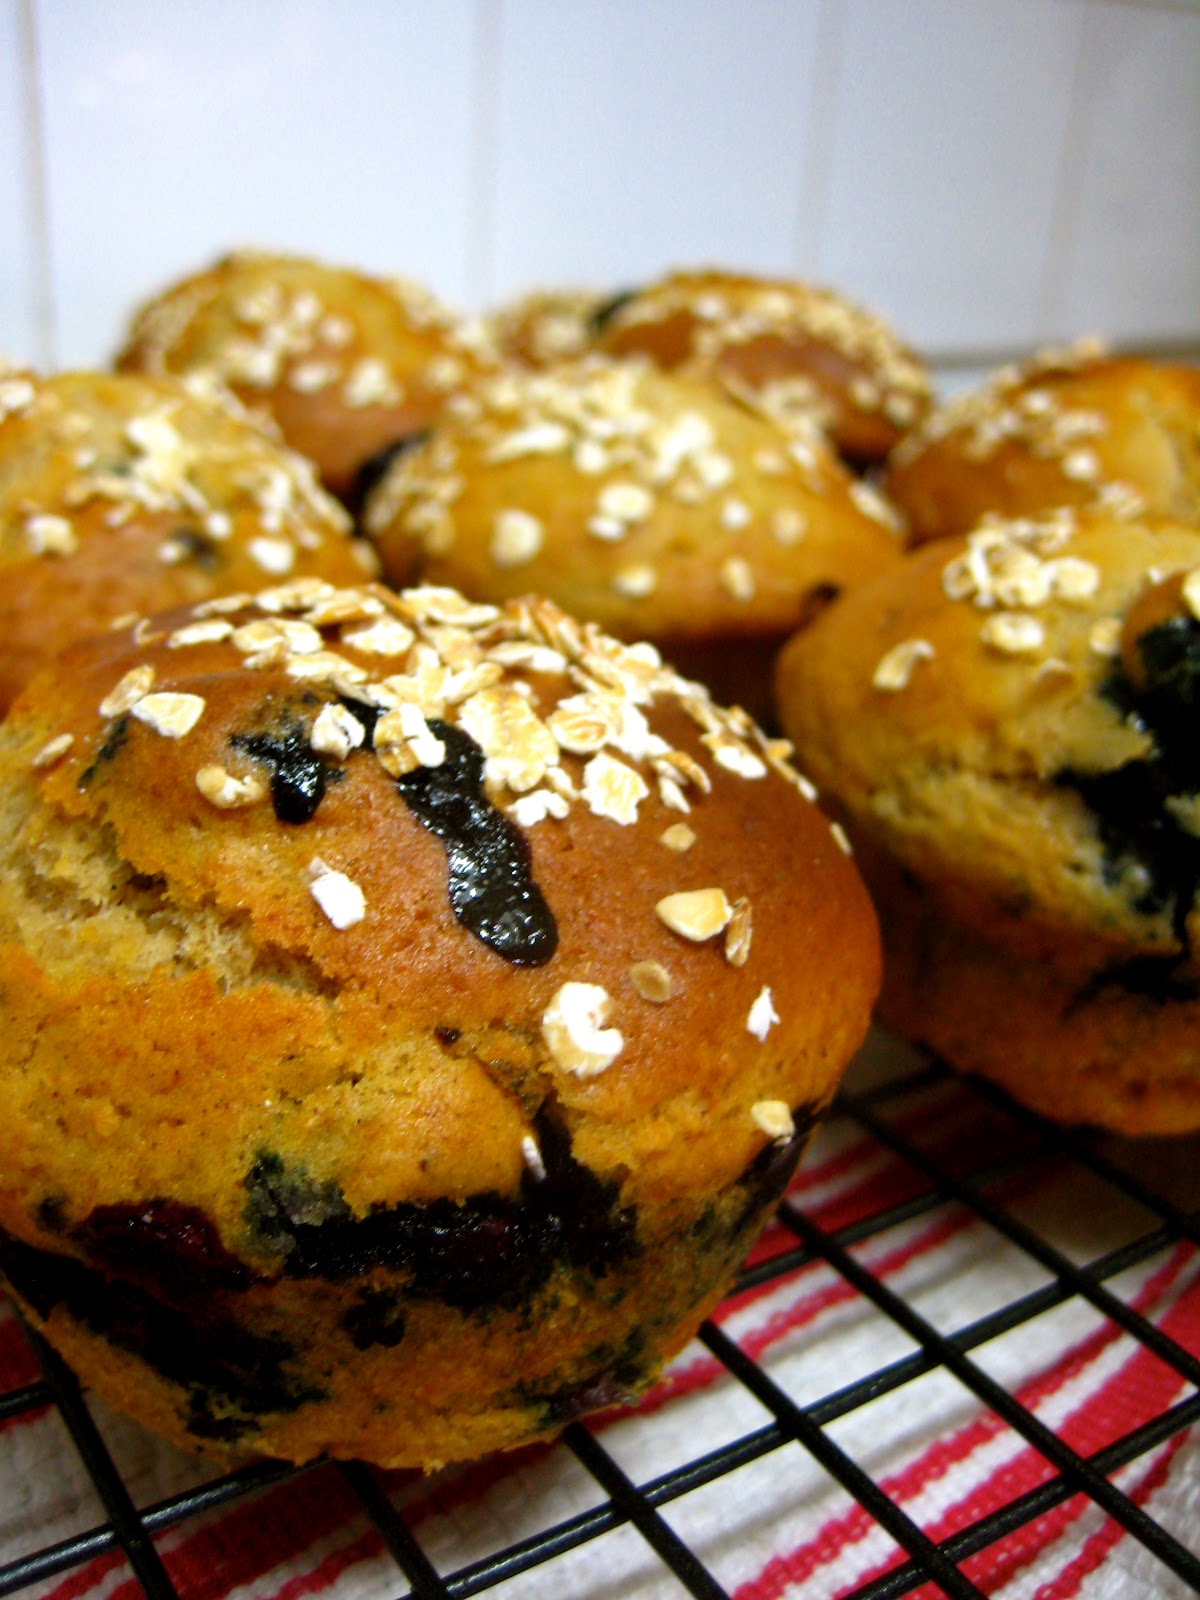
These blueberry muffins are everything a blueberry muffin should be. Takes me back to childhood when I made my first ever batch. They were a packet mix, the blueberries came in a tin and I may not have realised that you need to drain the liquid off. Needless to say, they turned out a little green and overly moist.

You won't make that mistake here as you use fresh or frozen berries.

These are also from my Aldi find, 'Muffins & Bakes' - from the .
  • 225g plain flour (can use wholemeal)
  • 1 tsp bicarb soda
  • 1 tsp allspice OR 1/2 tsp nutmeg & 1/2 tsp cinnamon
  • 115g caster sugar
  • 3 egg whites
  • 3 tbsp low-fat margarine, melted
  • 150ml natural yoghurt
  • 1 tsp vanilla essence
  • 150g blueberries*
  • 2 tbsp rolled oats
*I have also made these using 50g chopped strawberries and 1 apple, peeled and chopped.

Preheat oven to 190C (180C fan-forced). Line or grease a 12-whole muffin tin. 

Combine flour, bicarb, spices and sugar. Whisk egg whites until foamy and add to dry ingredients. Add margarine, yoghurt, vanilla and blueberries. Mix well. You may need to add a little milk if the mix is too dry. 

Spoon even amounts into muffin tin and sprinkle with rolled oats. Bake for 20-25 minutes until golden brown and oats crisp. Test with a skewer to ensure they're cooked through.

My old housemates used to devoured these in what seemed like minutes. Definitely ticks all snack criteria! 


10 July 2013

Nigella Challenge: Sponge Drops

A sponge cake-come-pikelet-come-whoopie pie, these little treats are everything. They can be elegant and special if needed, or you can slap them together quickly for a last-minute morning or afternoon tea. They'd even be good for night-time situations involving larger numbers of people and minimal seating (think BBQ). Everyone will be impressed, and there is even room for experimenting and making do with what you have. Kids could make these unattended, they're that simple!

These lasted 5 minutes before being devoured; I barely had time to photograph them!

[sponge]
  • 2 eggs
  • 75g (1/3 cup) caster sugar
  • 50g (1/3 cup) self-raising flour
  • 25g (1 heaped tbsp) cornflour
  • 1/2 tsp baking powder
  • 1/2 tsp vanilla (optional)
[filling]
  • 150ml thickened cream, whipped to soft peaks (add a little icing sugar to give them some firmness if you aren't serving straight away)
  • jam (use whatever - go crazy! Though blackberry or raspberry is good if you're stuck for ideas)
  • a punnet of berries (this is optional, and just use whatever is in season/matches your jam)
Preheat to 200C. Line 2 large baking sheets/trays with baking paper.

Using an electric mixer (hand-held or stand), lightly whisk the eggs. Add the sugar and whisk until it is pale and creamy. 

Sift the flour and baking powder in, and then fold gently to combine. Do make sure you  sift here. I'm not normally one for sifting (who can be bothered?), but trust me that it is necessary here. The mixture should resemble a thick, but still liquid, pancake batter.

Spoon dessert-spoonful sized amounts onto your trays. Leave plenty of room, as they grow quite a bit. And make sure you have an even number, or you'll be left with an odd side when it comes to sandwiching. Cook for 5 minutes (see what I mean about speedy!). Once they're golden all over, pull them out of the oven and lift off with an egg flip or spatula to cool on a wire rack. 

Once cool (shouldn't take too long), sandwich them together with the cream, jam and berries (which you're lightly crushed or chopped up finely).

Just a note, this doesn't make very many (about 8-10 sandwiches) but it is relatively easy to bulk up. I would just make repetitive batches though instead of making one huge batch.


1 July 2013

Nigella Challenge: Carrot Cupcakes w/ Cream Cheese Icing

I am a firm believer in carrot cake. It has its purpose - bearer of cream cheese icing. Yes, I only really eat the stuff so I can eat the icing! And it contains vegetables so I can pretend its a healthier cake option (Lies. All lies!)

That aside, these are very easy to whip up and can be done at short notice. I've never met a set of tastebuds that didn't like them!

  • 100g brown sugar
  • 175ml oil (use a seed or vegetable oil like sunflower or rice bran)
  • 2 eggs
  • 225g plain flour
  • 3/4 tsp bicarb soda
  • 1 tsp cinnamon
  • zest 1/2 a lemon
  • zest 1/2 an orange
  • 150g carrots, grated (this is about 2 larger ones)
  • 100g walnuts, roughy chopped
Preheat the oven to 200C. Grease a 12-hole muffin tray or pop in some patty cases.

Beat the sugar and oil together (I've done this with an electric mixer, and also by hand with much the same result and minimal effort). Add eggs one at a time. It will all come together, and turn a paler colour.

Add flour, bicarb, cinnamon, and zests. Fold in the carrot and nuts. Don't over mix, or like muffins, you'll end up with tough cakes. We want it light and just incorporated!

Spoon evenly into the tray and bake 20 minutes until they're risen and spring back when lightly touched on top. Remove cupcakes to cool on a wire rack and cover with a tea towel while you do the icing.

For the icing you will need:
  • 125g cream cheese (the block, not spreadable)
  • 250g icing sugar
  • 1-2 tsp lime or lemon juice (or 1 tsp of vanilla essence if fancy)
  • 12 walnut halves (optional for decorating, you could just finely chop some and sprinkle over as well)
Beat the cream cheese in the small bowl of an electric mixer at medium speed until softened and smooth. Slowly add the icing sugar (mixer on a low setting - we don't want an icing sugar mushroom cloud). Once its incorporated, turn up the mixer to medium speed and add the juice (or vanilla).

When the cupcakes are cool, slap on the icing. No technique is needed, just use a butter or palette knife to smooth it over and then top with walnuts. 


11 June 2013

Nigella Challenge: Burnt-Butter Brown-Sugar Cupcakes

The icing on these is just incredible! Thats really the only reason you need to make them, but if you need a little more convincing: the burnt-butter is not awful (like it sounds) but gives a lovely nutty taste to undercut the sweetness of the brown sugar. The brown sugar also means these have a delectable caramel flavour. Need more? There are very easy, but they sound impressive!

[cake batter]
  • 150g unsalted butter
  • 125g self-raising flour
  • 60g golden (raw) caster sugar
  • 65g light brown sugar
  • 2 eggs
  • 1 tsp vanilla extract
  • 1 tsp baking powder
  • 2-3 tbsp milk
[icing]
  • 150g unsalted butter
  • 250-300g golden icing sugar*
  • 1 tsp vanilla extract
  • 2-3 tbsp milk
*I wrote about where to find golden icing sugar here

Preheat oven to 200C and place muffin cases into a 12-whole muffin tin. 

To burn butter, put it in a small saucepan over medium heat and stir until it turns a dark golden colour. Take it off the heat and pour through a sieve to remove any sediment. Set aside to solidify, but don't put it in the fridge. You want it solid, but not cold. It should do fine at room temperature. If its a hot day, wait until it has set to preheat your oven.

Place butter, sugars and vanilla into a bowl and cream with an electric mixer. Add eggs one at a time, followed by a spoonful of flour. Slowly add flour, and then enough milk to make a smooth, soft mixture. Nigella describes this as a "dropping" consistency. 

Alternatively, you can throw all the ingredients (except the milk) into a food processor and process until smooth. Add the milk until it reaches that "dropping" consistency. 

Divide the batter amongst the tin and bake 15-20 minutes. 

Meanwhile, get started on the icing. Burn the butter in the same way as above, and sieve to remove and sediment, and set aside to solidify. When it is, beat it with half the icing sugar in an electric mixer until its very stiff. Add 1 tablespoon of milk at a time, followed by some more sugar. When all used up, add the vanilla.

Once the cupcakes are cooled, spread over the icing. No fancy stuff, just lump it on thick. These are rustic cupcakes. 

burnt butter brown sugar cupcakes

burnt butter brown sugar cupcakes


burnt butter brown sugar cupcakes

17 May 2013

Nigella Challenge: Fairy Cakes

Who doesn't love cupcakes? Fairy cakes are basically that, but the sound even cuter. Incredibly basic they can be morphed into almost anything through flavouring and decoration adjustments. I made these ones plain, but there are a million things you can do. Visit a cake decorating shop, or even just the baking aisle of the supermarket and get creative! You'll find flowers, animals, and other shapes made out of sugar, plus edible glitter and every sprinkle combination you could imagine. You can also get busy testing out icing colours. Of course I favour traditional pastels, but there are so many to choose from these days that you can colour as you please! They are also wonderful topped with berries or chocolate (shaved would be my preference) and lollies. You can swap the vanilla essence for another essence to to flavour the cake (I like rosewater with pink icing). Again, browse the supermarket shelves and try something that takes your fancy. The opportunities are endless!

If anyone gets really creative send me a picture and you might see it on the blog! (That actually goes for any recipes - I love to see other peoples kitchen creations).
  • 125g unsalted butter, softened
  • 125g caster sugar
  • 2 eggs
  • 125g self-raising flour
  • 1/2 tsp vanilla
  • 2-3 tbsp milk
  • 500g packet instant royal icing*
Preheat oven 200C. Line a 12-whole muffin tin with patty cases (you can find loads of pretty ones in kitchen shops and online).

This is easily made in a food processor. Just add all the ingredients except the milk and process until smooth. Slowly add the milk 1 tablespoon at a time until it is a soft, dropping/pouring consistency.

If you don't have a food processor, first cream the butter and sugar with an electric mixer (or by hand with a sturdy whisk, which would be quite a work out!). Add the eggs and vanilla, and gradually add the flour a spoonful at a time. Add the milk as above.

There isn't much mixture, but a little goes a long way. Fill each muffin-whole evenly (about half to 2-thirds full). Bake for 15-20 minutes until risen and golden. Remove to a wire rack to cool.

Once the cupcakes are cool, slice off the tops so you have a relatively flat surface to ice (you can keep the sliced off bits to do butterfly cakes if you like) make up the icing according to packet instructions. If you use only one colour for the icing, you'll probably only need half the packet but keep it handy just in case. Add a few drops of the colour of you choice and spoon over cupcake, filling to top of wrapper and smoothing off. Top with you decoration of choice, pressing it gently into the surface of the icing. 

*If you can't get instant royal icing, follow this recipe.


2 April 2013

Book Review: The Hummingbird Bakery Cake Days

hummingbird bakery cake days
The Hummingbird Bakery Cake Days: Recipes to Make Every Day Special by Tarek Malouf
My rating: 3 of 5 stars

I was left slightly disappointed by this cookbook. The recipes are delicious, and they are also fairly easy to follow. It's all very fashionable.

And that was my problem. There was nothing ground breaking flavour-wise. There wasn't anything that I stopped and went "Oh my, I HAVE to make these IMMEDIATELY".

If you're after a book to start you on your way to cupcake supremacy, I can only recommend this book. But if you want something a little more dramatic, I'd go it alone.


Buy This Book from Book Depository, Free Delivery World Wide

20 March 2013

Honey Jumble Cakes

VINTAGE POST:

In classic me-style, at about 9:30 last night I decided it was a great idea to bake. Also great time for a cleaning spree. Home alone on a Saturday night and I'm cleaning? WHAT KIND OF 20-YEAR-OLD UNI STUDENT AM I??? I'm pretty sure I have a problem and need help. My housemate would agree with this no doubt - come to think of it I think he's expressed this on a number of occasions. I am actually really keen to do my ironing! If anyone has any ideas on how to make me a more appropriate uni student let me know asap. Please!

Anyway, these are Donna Hay's honey jumble cakes. They smell amazing when they're in the oven. The whole house smelt like honey! Until I killed it off by bleaching a shirt...
  • 1 cup self raising flour
  • 1/2 tsp baking powder
  • 1/4 cup caster sugar
  • 1/2 tsp cinnamon (or nutmeg... or both... whatever takes your fancy really)
  • 1/2 cup honey
  • 70g butter
  • 1 egg
  • 1/2 cup milk
Preheat oven to 160C (170 for conventional).

Combine dry ingredients in a bowl. Melt butter and honey over low heat until smooth. Whisk egg and milk. Add wet ingredients to dry and mix well till smooth.

You can bake these in either mini loaf tins or in muffin tins. I just used regular muffin tins. Pour mix into tin and bake for 20-30 mins till golden and cooked through. Should spring back when pressed on top/knife or skewer should come out clean. 

While they're baking, mix up the icing using 1 cup icing sugar (use 2 if you use an electric mixer/beater), 2 tbsp soft butter, 2 tbsp honey and 1 tbsp hot water. If you use an electric mixer the icing will be thick and creamy. If you mix by hand it will be quite runny and more like a glaze, which I quite like. Make sure muffins are cool before icing or you'll have a massive mess! 

I munched on one with a cup of French Earl Grey from T2 this afternoon. Yum yum!

Happy blogging times with tea and cake.